The Essential Guide to Press Forming Metal Parts in 5 Easy Steps
By: Pablo Arzate
1,197 words | 8 minutes
Press-forming is nothing new to the traditional world of manufacturing. This quick, versatile, and easy technique of turning sheet metal into finished parts has been evolving since it started back in the early 14th century. Today, entrepreneurs and SMEs are reviving this technique with the conception of a 21st century invention: the 3D printer.
Let’s explore how additive manufacturing has opened the door for inventors, product designers, and makers to bend metal by using common PLA 3D printed plastic, a vice-grip or a hydraulic 20-ton press. 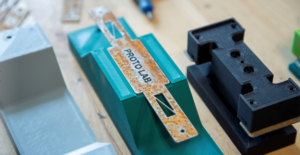
Traditionally, the cost and time required to be spent in creating tooling of this kind would make it really hard if not impossible for individual innovators or small businesses to acquire without investing hundreds if not thousands of dollars. Here at the Bayview Yards Prototyping Lab, we receive dozens of requests each month for parts and final product design. Understanding the challenges SMEs face when developing a new product, we always seek the most effective method, with budget and time as key considerations. This is where 3D printing and inexpensive materials such as PLA plastic come into play.
FDM MOLDING FOR SHEET METAL FORMING
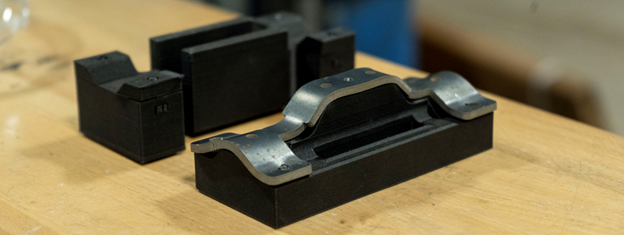
Soft tooling for sheet metal forming can be quite expensive starting with an average cost of $3,000 USD. These tools/molds are typically made of P20, H13, and D2 tool steel. By using a common Prusa mk3 and inexpensive PLA plastic, we are able to minimize costs considerably without compromising functionality.
Of course, bending metal with plastic comes with a series of PROS and CONS, let’s find out what these are according to our experience working and playing with them.
PROS
- Very cost effective
- Versatile and easy to iterate
- Fast turn-around time
- Complete geometry freedom from 3DP
- Multi-step molds are easy to accommodate
cons
- Life of tool not as long as metal tools
- Tool will have a tendency to break after extensive use
- Limited to malleable materials
- Limited to 1/8 or thinner materials
- Reduced cycles with certain more complex bents
RETHINKING TOOLMAKING
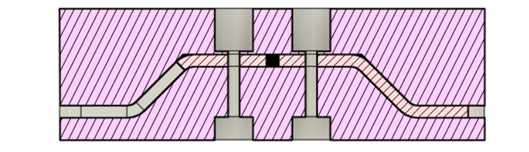
Although the process of creating a soft tool out of plastic rather than steel is very similar, there are certain considerations and limitations to consider in order to improve success rate and repeatability, two aspects of prototyping that are key to a successful product design. But first let’s revisit the process of sheet metal forming.
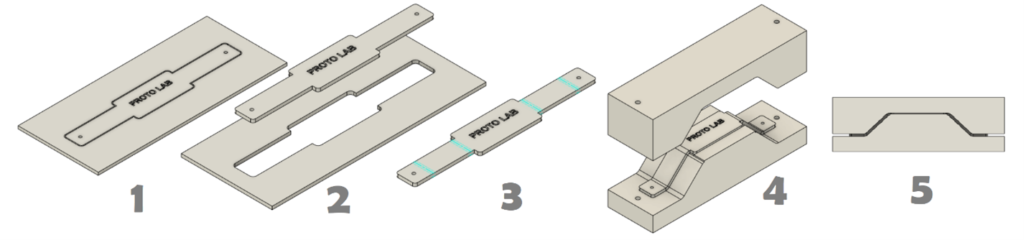
step I
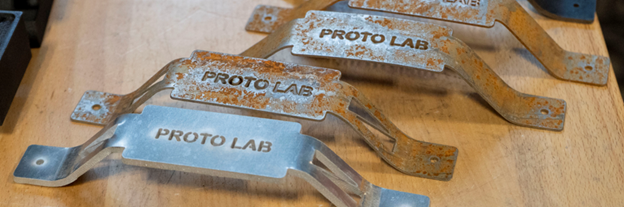
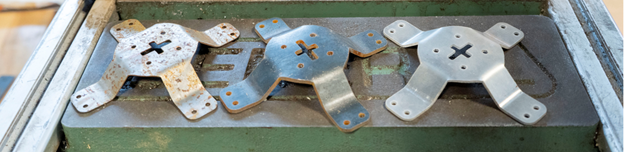
Design and cut your metal sheet in the desired material and thickness. In our case we used a combination of 1/8 and 1/16 aluminum and steel sheets. We used our in-house water-jet to cut the pieces with extra accuracy. Learn more about our water–jet use and services.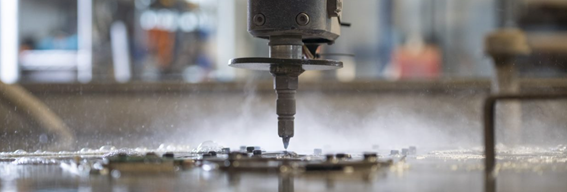
step II
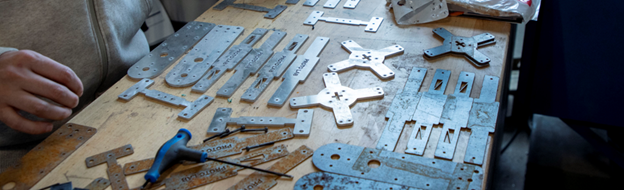
Extract the cut part(s).
step III
Consider the thickness of your material and the bending points to create a mold that will accurately fit in the shape and design of your part. For this example, we used Fusion 360 and it’s sheet metal capabilities to create both the flat metal shape and the 3D printed mold. Learn more about our CAD/CAM services.
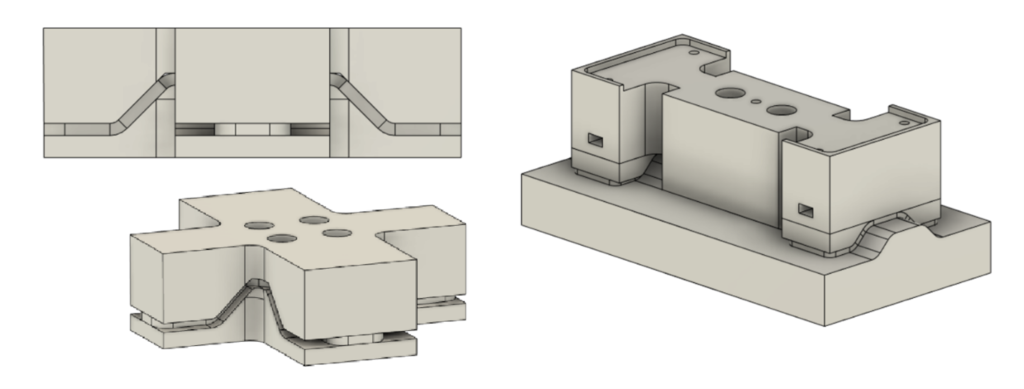
step IV
Design the mold and consider how the piece will stay in place, and how will you ensure the two parts don’t shift or move during the process. Ideally, you’d use guides where a screw or rod can easily move up and down without causing any friction. In our case, we used self-tapping half-threaded M3 screws.
step V
Use a vice-grip or a hydraulic press to form the metal. Make sure you don’t put more pressure than what it needs so you can extend your tools life.
There are some considerations and limitations you’ll have to consider if you want to try this technique on your own.
considerations
Lubrication: Although lubrication was not absolutely essential in our experience, it did help with extending the cycles and overall mold life. Preventing any sort of friction (which is especially present in 3D printing due to the layering of material) will significantly improve the life of your tool and make the bending process much smoother. We used WD-40 and were pleased with the results. 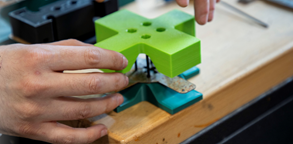
Guides: Rails or guides for the two parts of the mold to maintain alignment are a must. There is a wide range of possibilities when creating these, but simple rods, screws, or bolts will work if no friction is generated. Guides will help the mold meet at the exact spot where you planned to do your bends so make sure you implement these.
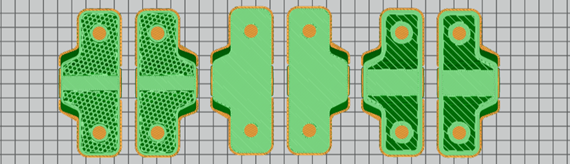
Density and Shells: When printing your mold with PLA (or your preferred plastic) it is best to reinforce the interior infill and shells to better sustain the pressure generated through the forming process. A good rule of thumb is to start with at least three exterior shells (roof, floor, and walls) and a heavy infill density. In our experience, 65% infill and three to four shell walls worked well.
Watch the pressure: Keep in mind, the maximum forming pressure will be dependent upon the material being formed/bended and the tool/mold material. Research the appropriate range of bendability of the chosen material. In our case, when using exclusively steel and aluminum 1/8-1/16, it came down to (21 MPa – 69 MPa).
limitations
Material thicknesses: There is a limit to the thickness this type of mold can work with. For our purposes, that limit was 1/8″. The type of material you are using will determine the thickness limitations of your mold. For example, aluminum is much more malleable than steel so maybe going thicker on that specific material can yield positive outcomes.
Limited cycles: PLA plastic will degrade, break or deform at some point (much earlier than a metal mold). However, if a replacement tool is required, you can 3D print a new mold relatively quickly.
The shop is equipped with advanced additive manufacture and CNC equipment, including metal 3D printing, waterjet cutting, and engineering and prototyping materials such as ULTEM or nylon. Contact the Lab to discuss your project.
About the author
Pablo Arzate – Industrial Designer, Prototyping Lab
 Pablo is our industrial designer at the Bayview Yards’ Prototyping Lab. He has experience designing products for healthcare, science, and fashion along with other consumer product industries. His design technique is based strongly on collaboration and experimentation. Pablo’s creative and technical skills shine when designing for additive manufacturing, especially when approached in rapid prototyping cycles.
Pablo’s experience can help you bring your ideas to life. He’ll work with you to select the best technology to manufacture your product through 3D printing and other exceptional prototyping lab capabilities.
On the side, Pablo is a drone hobbyist, designing and manufacturing lightweight UAV’s. He also provides jewelry brands with unique custom 3D model collections and even has a company of his own.